CentOS 7 安装 LEMP - PHP5.6 + NGINX + MariaDB/MySQL
条评论什么是 LEMP
以前我们常常听说的 LAMP (Linux, Apache, MySQL, and PHP) 是最经典的建站环境之一,迄今仍旧够到很多中小站长的欢迎。但 Apache 的缺点是有些臃肿,资源开销比较大,对硬件的要求相较于其它一些轻量的 Web 服务器要高,, 而 MySQL 的母公司 SUN 在被 Oracle 收购之后,社区担心 MySQL 的开源许可可能会存在闭源风险,于是 MySQL 之父 Michael Widenius (often called Monty) 以他女儿 Maria 的名字创建了MySQL的另外一个衍生版本:MariaDB。在用 NGINX 替代 Apache 和 MariaDB 替代 MySQL 之后,LEMP 就诞生了,尤其适用于服务器资源吃紧,内存少又想压榨出高并发高流量性能的场景。
测试环境
本文所述的环境基于腾讯云 CentOS 7.5 64-bit 公共镜像搭建,安装完成后的各组件版本如下:
- CentOS 7.5 64-bit
- NGINX 1.14.2
- MariaDB 5.5.60
- PHP 5.6.39*
*CentOS 官方默认带的 PHP 为 5.4.16,而我们某些程序需要 5.6+ 才能正常运行,本文的目的就是记录下如何安装 PHP5.6 的 LEMP环境
开始前的准备工作
时间设置
列出当前时间相关设置timedatectl status
1 | Local time: Fri 2018-12-28 13:20:01 CST |
1.设置时区sudo timedatectl set-timezone Asia/Shanghai (这一步腾讯云的 CentOS 公共镜像已经设置好,可跳过)
2.安装 NTPsudo yum install ntp
3.设置为与 NTP 服务器同步sudo timedatectl set-ntp true
4.同步时间sudo ntpdate pool.ntp.org
5.再检查时间设置timedatectl status
1 | Local time: Fri 2018-12-28 14:05:53 CST |
安装 yum-utils 软件包便于管理维护
sudo yum install yum-utils
获取系统最新更新
sudo yum update #生产环境慎用,这条命令会更新所有软件包,可能会破环依赖关系
或者用下面 sudo yum -y update --security 这条命令只更新安全补丁,胆子小的可以用 sudo yum update-minimal --security -y
不管更新啥,在测试环境测好再部署到生产环境是必要的
添加含有各种 PHP 版本的 Remi 仓库 (本文用的清华大学镜像站点)
sudo yum install https://mirrors.tuna.tsinghua.edu.cn/remi/enterprise/remi-release-7.rpm
启用 Remi 仓库中 PHP 5.6 的源
sudo yum-config-manager --enable remi-php56
NGINX
本文推荐从 NGINX 的官方源来安装
1.创建 /etc/yum.repos.d/nginx.repo 文件,内容如下
1 | [nginx] |
2.更新源信息sudo yum check-update
3.安装 NGINXsudo yum install nginx
4.启动 NGINXsudo systemctl start nginx
5.将 NGINX 添加到开机自启动sudo systemctl enable nginx
6.测试 NGINX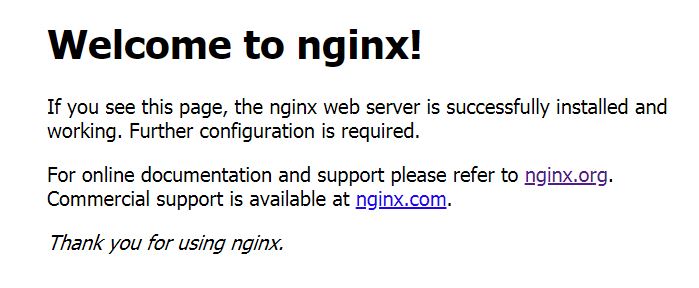
MariaDB
1.安装 MariaDB 和 MySQL/MariaDB-PHP 支持包sudo yum install mariadb-server php-mysql
2.启动 MariaDBsudo systemctl start mariadb
3.将 MariaDB 添加到开机自启动sudo systemctl enable mariadb
4.安全设置sudo mysql_secure_installation
因为是新安装的 MariaDB,还没有为 root 用户设置密码,直接按回车键
Enter current password for root (enter for none):
接下来按 Y 设置 root 密码
Set root password? [Y/n] Y
New password:
Re-enter new password:
Password updated successfully!
Reloading privilege tables..
… Success!
按 Y 或者直接回车键接受以下四个默认安全设置
- Remove anonymous users?
- Disallow root login remotely?
- Remove test database and access to it?
- Reload privilege tables now?
最后看到如下字样即表示安全设置完成
1 | All done! If you've completed all of the above steps, your MariaDB |
PHP 5.6
1.安装 PHP FastCGI Processing Managersudo yum install php-fpm
2.已知漏洞修复
编辑 /etc/php.ini 文件,关闭 NGINX + PHP-FPM 中关于 fix_pathinfo 的一个漏洞,详情参见这篇文章sudo sed -i 's/;cgi.fix_pathinfo=1/cgi.fix_pathinfo=0/g' /etc/php.ini
**3.修改 /etc/php-fpm.d/www.conf
PHP 默认是以 Apache 来作为 Web 服务器的,所以其运行的默认用户为 apache,我们需要修改为 nginx
1 | sudo sed -i 's/user = apache/user = nginx/g' /etc/php-fpm.d/www.conf |
4.启动 PHP-FPMsudo systemctl start php-fpm
5.将 MariaDB 添加到开机自启动sudo systemctl enable php-fpm
配置 NGINX 使其解析 PHP 文件
1.创建你网站程序的目录sudo mkdir -p /var/www/example.com/
2.禁用 NGINX 默认的站点配置文件sudo mv /etc/nginx/conf.d/default.conf /etc/nginx/conf.d/default.conf.disabled
3.创建 example.com 的站点配置文件sudo vi /etc/nginx/conf.d/example.com.conf
1 | server { |
4.测试 PHP 解析sudo vi /var/www/example.com/info.php
编辑该文件内容如下:
1 | phpinfo(); |
然后访问 http://example.com/info.php ,正常的话你应该能看到 PHP 信息页面了。
5.404 not found/403 Forbidden
如果你确认以上操作都已经正常进行,NGINX 和 PHP-FPM 的配置文件都已经改好,但是在访问 PHP 页面的时候出现 404 not found/403 Forbidden 或者 FastCGI sent in stderr: Unable to open primary script 错误,那么有可能是 SELinux 的问题。你可以通过查看 SELinux 的审计日志 /var/log/audit/audit.log 来确认,一般会出现 avc: denied { read } for pid=1213 comm=”nginx” name=“info.php”… 之类的错误。
问题确认后,我们用 setstatus 来查看当前的 SELinux 设置
1 | # sestatus |
或者 cat /etc/selinux/config
1 | # cat /etc/selinux/config |
如果当前状态是 enforcing,说明 SELinux 已经启用,那么你可以试着用 setenforce 0 禁用 SELinux(只显示告警)再尝试访问 PHP 文件,如果可以成功访问那你也有两个选择,一是禁用 SELinux (可能没那么安全),二是使用 restorecon 来恢复网站目录的 SELinux 安全配置上下文信息:restorecon -R -v /var/www/example.com
若是之后部署有些网站程序还是没法访问,确定是 SELinux 的锅但是你又想留着它的话,可参考以下几篇文章: