Intel NUC8i7BEH 读卡器魔改完美安装黑苹果
条评论GitHub
本文引用自我的 GitHub:
OS-X-NUC8i7BEH-Clover
OS-X-NUC8i7BEH-Clover
This repository contains the files and scripts to install macOS on a modded Intel NUC8i7BEH (Bean Canyon).
Hardware
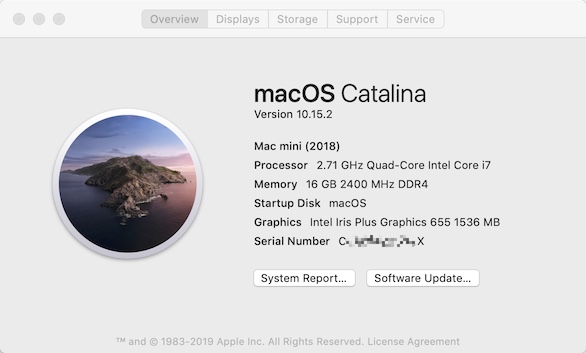
Specs:
- CPU: Intel i7-8559U, 4c/8t, base 2.7Ghz, turbo 4.5Ghz, 28w TDP.
- Graphic: intel Iris plus 655 with 128 eDRAM.
- RAM: Two sockets 260-pin 1.2 V DDR4 SDRAM SO-DIMM (up to 32Gb, and 2400Mhz)
- LAN: Intel I219V Gigabit Ethernet Controller (10/100/1000 Mbps)
- Wi-Fi/BT: Intel Dual Band Wireless-AC 9560 (soldered)
- 1 * Thunderbolt 3 Four lanes 40Gbps, support DisplayPort 1.2 (17Gbps, up to 4096x2304@60Hz), support USB data (10Gbps)
- 1 * HDMI 2.0a (MegaChips MCDP2800 LSPCon DisplayPort1.2-to-HDMI 2.0 up to 4096x2160@60Hz)
- 1 * SATA 6 Gbps, 2.5” (540 Mbps)
- 1 * M.2 connector (key type M and B+M) for 2242 and 2280 modules. Four lanes (4 Gbps)
- 4 * USB-A 3.1 (gen2 10Gbps). One port can deliver 1.5A
- 1 * Micro SDXC Card Reader
- 1 * Jack 3.5mm Realtek HD Audio
My specification
- 2 * Hynix HMA81GS6AFR8N-UH 8GB DDR4-2400 SODIMM
- WD Black SN750 NVMe 512G
- BCM94360CS2 Wi-Fi/Bluetooth with adapter (will explain how)
Mod
NUC8i7BEH uses RTS5227S (use pcie x1) chipset for SD card which can be desoldered/replaced with a BCM94360CS2(or BCM942602CS) to get native AirDrop/Handoff support.
Two possible Mods:
https://www.chiphell.com/thread-2004976-1-1.html (Chinese) - My NUC8 Mod
https://www.mydigit.cn/forum.php?mod=viewthread&tid=34830&extra=&page=1 (Chinese) - also looks great!
Configure BIOS Settings
On my NUC8i7BEH, BIOS version updated to 0071.
The boot menu and BIOS setup can be accessed by mashing the F2 key during BIOS startup. After the main screen comes up choose “Advanced”. That gets you to the main BIOS setup screens.
To start, choose “Load Defaults” (choose from the menu or press F9 in the BIOS setup).
Then change:
- Boot->Boot Configuration, disable “Network Boot”
- Power->Secondary Power Settings, “Wake on LAN from S4/S5”, set to “Stay Off”
These settings are important but are already set as needed by “Load Defaults”
- Devices->Video, “IGD Minimum Memory” set to 64mb or 128mb
- Devices->Video, “IGD Aperture Size” set to 256mb
- Boot->Secure Boot, “Secure Boot” is disabled
- Boot->Boot Priority->Legacy Boot Priority, enable “Legacy Boot” (continue to boot UEFI, but enable legacy for CSM)
(you will have KP/reboot without it).
The following settings are important for Mod users
- Devices->Onboard Devices, disable WLAN and Bluetooth
- Devices->Onboard Devices, enable SD Card to Read/Write as we desoldered/replaced with a BCM94360CS2(or BCM942602CS).
Press F10 to save changes.
Power Management
Everything required for CPU/IGPU power management is already installed with the steps above.
There is no longer any need to use the ssdtPRgen.sh script.
Be aware that hibernation (suspend to disk or S4 sleep) is not well supported on hackintosh.
You should disable it:
1 | sudo pmset -a hibernatemode 0 |
Always check your hibernatemode after updates and disable it. System updates tend to re-enable it, although the trick above (making sleepimage a directory) tends to help.
Installation
- To be updated
Tested OS
- macOS Mojave 10.14.6
- macOS Catalina 10.15.2
Clover
- Clover r5102
Kexts
- CPUFriend.kext (1.1.9)
- VirtualSMC.kext (1.0.9)
- SMCProcessor.kext (1.0.9)
- SMCSuperIO.kext (1.0.9)
- IntelMausi.kext (1.0.2)
- USBPorts.kext (1.0)
- SATA-unsupported (0.9.2)
- Lilu.kext (1.4.0)
- AppleALC (1.4.4)
- WhateverGreen.kext (1.3.5)
Works
- UEFI booting via Clover
- AirDrop, Handoff
- DP/HDMI video/audio
- AirPlay mirroring to AppleTV
- Native USB3/USB2
- Native audio with AppleHDA
- Native power management
- GPU Hardware Acceleration
- Wired Ethernet
- Mac App Store working
- Sleep (hibernation disabled, not tested)
- Dual Displays (1 HDMI, 1 USB-C to DP)
Other
- Remove USB Port:HS10 (Built-in Bluetooth)